こんにちは、阪本です。

Springのメジャーバージョンアップに伴い、Spring Bootも晴れて1.0となりました。
Spring Bootは、Spring周りの依存関係をシンプルに解決してくれるフレームワークですが、今流行りの(流行る予定の?)Dropwizardを意識した作りになっています。
どれだけシンプルにできるのか、見てみようと思います。
超シンプルなWebアプリの作成
では早速、Webアプリを作ってみましょう。
手始めに、サーバにアクセスすると固定文字列を返す(いわゆるHello World的な)アプリを作ってみます。
まず、下ごしらえとして、Mavenのpom.xmlを作成します。
<project xmlns="http://maven.apache.org/POM/4.0.0"
    xmlns:xsi="http://www.w3.org/2001/XMLSchema-instance"
    xsi:schemaLocation="http://maven.apache.org/POM/4.0.0 http://maven.apache.org/maven-v4_0_0.xsd">
  <modelVersion>4.0.0</modelVersion>
  <groupId>springboot</groupId>
  <artifactId>sample</artifactId>
  <packaging>jar</packaging>
  <version>1.0.0</version>
  <name>SpringBootSample</name>

  <parent>
    <groupId>org.springframework.boot</groupId>
    <artifactId>spring-boot-starter-parent</artifactId>
    <version>1.0.2.RELEASE</version>
  </parent>

  <dependencies>
    <dependency>
      <groupId>org.springframework.boot</groupId>
      <artifactId>spring-boot-starter-web</artifactId>
    </dependency>
  </dependencies>

  <build>
    <plugins>
      <plugin>
        <groupId>org.springframework.boot</groupId>
        <artifactId>spring-boot-maven-plugin</artifactId>
      </plugin>
    </plugins>
  </build>
</project>
なんと、dependencyは「spring-boot-starter-web」を指定するのみ!
ちなみに、packagingが「jar」になっていることに注意。
・・・そう、単体のアプリケーションで動作するんです。
(ちなみに、warファイルを作成することも可能。)
次は、コントローラを用意します。特に何の変哲もない、普通のコントローラですね。
package springboot.sample.controller;

import org.springframework.stereotype.Controller;
import org.springframework.web.bind.annotation.RequestMapping;
import org.springframework.web.bind.annotation.ResponseBody;

@Controller
public class SampleController {
    @RequestMapping("/home")
    @ResponseBody
    public String home() {
        return "Hello Spring Boot!!";
    }

}
最後に(もう最後!)メインクラスを用意します。
package springboot.sample;

import org.springframework.boot.SpringApplication;
import org.springframework.boot.autoconfigure.EnableAutoConfiguration;
import org.springframework.context.annotation.ComponentScan;

@ComponentScan
@EnableAutoConfiguration
public class Application {

    public static void main(String[] args) {
        SpringApplication.run(Application.class, args);
    }

}
あとは、maven packageして、jarを実行するだけ。
java -jar sample-1.0.0.jar
jarの中に必要なライブラリが含まれているため、クラスパスの指定も不要!
このあたり、Dropwizardライクな感じですね。
コンソールにはこんな出力があり、約2秒で起動しました。
組み込みTomcatが起動しています。(ちなみにJettyにも変更可能です。)
  .   ____          _            __ _ _
 /\\ / ___'_ __ _ _(_)_ __  __ _ \ \ \ \
( ( )\___ | '_ | '_| | '_ \/ _` | \ \ \ \
 \\/  ___)| |_)| | | | | || (_| |  ) ) ) )
  '  |____| .__|_| |_|_| |_\__, | / / / /
 =========|_|==============|___/=/_/_/_/
 :: Spring Boot ::        (v1.0.2.RELEASE)

2014-06-01 10:55:28.993  INFO 7740 --- [           main] springboot.sample.Application            : Starting Application on ...
2014-06-01 10:55:29.026  INFO 7740 --- [           main] ationConfigEmbeddedWebApplicationContext : Refreshing org.springframework.boot.context.embedded.AnnotationConfigEmbeddedWebApplicationContext@16022d9d: startup date [Tue Apr 25 01:55:29 JST 2014]; root of context hierarchy
2014-06-01 10:55:29.824  INFO 7740 --- [           main] .t.TomcatEmbeddedServletContainerFactory : Server initialized with port: 8080
2014-06-01 10:55:30.016  INFO 7740 --- [           main] o.apache.catalina.core.StandardService   : Starting service Tomcat
2014-06-01 10:55:30.016  INFO 7740 --- [           main] org.apache.catalina.core.StandardEngine  : Starting Servlet Engine: Apache Tomcat/7.0.52
2014-06-01 10:55:30.109  INFO 7740 --- [ost-startStop-1] o.a.c.c.C.[Tomcat].[localhost].[/]       : Initializing Spring embedded WebApplicationContext
2014-06-01 10:55:30.110  INFO 7740 --- [ost-startStop-1] o.s.web.context.ContextLoader            : Root WebApplicationContext: initialization completed in 1087 ms
2014-06-01 10:55:30.490  INFO 7740 --- [ost-startStop-1] o.s.b.c.e.ServletRegistrationBean        : Mapping servlet: 'dispatcherServlet' to [/]
2014-06-01 10:55:30.492  INFO 7740 --- [ost-startStop-1] o.s.b.c.embedded.FilterRegistrationBean  : Mapping filter: 'hiddenHttpMethodFilter' to: [/*]
2014-06-01 10:55:30.760  INFO 7740 --- [           main] o.s.w.s.handler.SimpleUrlHandlerMapping  : Mapped URL path [/**/favicon.ico] onto handler of type [class org.springframework.web.servlet.resource.ResourceHttpRequestHandler]
2014-06-01 10:55:30.875  INFO 7740 --- [           main] s.w.s.m.m.a.RequestMappingHandlerMapping : Mapped "{[/],methods=[],params=[],headers=[],consumes=[],produces=[],custom=[]}" onto public java.lang.String springboot.sample.controller.SampleController.home()
2014-06-01 10:55:30.888  INFO 7740 --- [           main] o.s.w.s.handler.SimpleUrlHandlerMapping  : Mapped URL path [/webjars/**] onto handler of type [class org.springframework.web.servlet.resource.ResourceHttpRequestHandler]
2014-06-01 10:55:30.889  INFO 7740 --- [           main] o.s.w.s.handler.SimpleUrlHandlerMapping  : Mapped URL path [/**] onto handler of type [class org.springframework.web.servlet.resource.ResourceHttpRequestHandler]
2014-06-01 10:55:30.981  INFO 7740 --- [           main] o.s.j.e.a.AnnotationMBeanExporter        : Registering beans for JMX exposure on startup
2014-06-01 10:55:30.999  INFO 7740 --- [           main] s.b.c.e.t.TomcatEmbeddedServletContainer : Tomcat started on port(s): 8080/http
2014-06-01 10:55:31.001 INFO 7740 --- [ main] springboot.sample.Application : Started Application in 2.326 seconds (JVM running for 2.7)そして、http://localhost:8080/home にアクセスすると、こんな感じに、文字が表示されました。
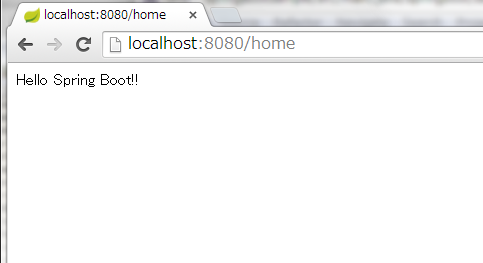
web.xmlいらず、applicationContext.xmlいらずでWebアプリが立ち上がるなんて、超シンプルですね!
Thymeleafを用いた画面作成
先ほどは、URLにアクセスすると単に文字列を返すだけのものでした。
今度は、Thymeleafを用いて画面を作成します。
まず、pom.xmlにThymeleafを追加します。
<dependency>
  <groupId>org.thymeleaf</groupId>
  <artifactId>thymeleaf-spring4</artifactId>
</dependency>
次に、ThymeleafのHTMLテンプレートファイルを作成します。
HTMLテンプレートファイルはsrc/main/resources/templatesディレクトリの下に配置します。
hello.html
<!DOCTYPE html>
<html xmlns:th="http://www.thymeleaf.org">
<body>
  <h1>
    Hello Spring <span style="color: red">Boot!!</span>
  </h1>
</body>
</html>
最後に、上で作ったhello.htmlを表示するよう、Controllerを書き換えます。
package springboot.sample.controller;

import org.springframework.stereotype.Controller;
import org.springframework.web.bind.annotation.RequestMapping;

@Controller
public class SampleController {
    @RequestMapping("/home")
    public String home() {
        return "hello";
    }

}
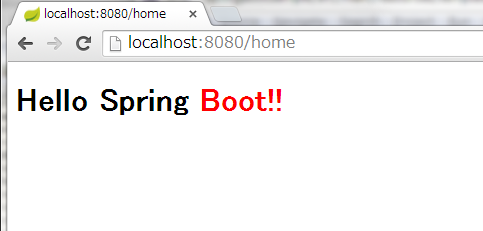
先ほどと同じく http://localhost:8080/home にアクセスすると、hello.htmlの内容が表示されました。
監視&デバッグ
デバッグ時に、Springコンテキストに何が登録されているか、分かると便利ですよね?
Spring Bootでは、pom.xmlに以下を追加するだけで、Web画面にコンテキストの内容を表示できます。
<dependency>
  <groupId>org.springframework.boot</groupId>
  <artifactId>spring-boot-starter-actuator</artifactId>
</dependency>
起動した後、http://localhost:8080/beans にアクセスすると、以下のようなJSONデータが表示されます。
[
  {
    "beans": [
      {
        "bean": "application",
        "dependencies": [],
        "resource": "null",
        "scope": "singleton",
        "type": "springboot.sample.Application"
      },
      {
        "bean": "sampleController",
・・・
実際には、改行されずに出力されるので、整形する必要はあります。
コンテキスト以外にも、以下のような様々な情報をWebから取得できるようになります。
- 環境変数(http://localhost:8080/env)
- Controllerのマッピング状態(http://localhost:8080/mapping)
- HTTPリクエストトレース(http://localhost:8080/trace)
- アクセスカウンタ/メトリクス(http://localhost:8080/metrics)
- スレッドダンプ(http://localhost:8080/dump)
ここもDropwizard的ですね。
WebアプリにSSH接続
なんと!起動したWebアプリにSSHで接続してコマンドを実行することができます!!
pom.xmlに以下を追加して、ビルド&起動。
<dependency>
  <groupId>org.springframework.boot</groupId>
  <artifactId>spring-boot-starter-remote-shell</artifactId>
</dependency>
起動途中に、コンソールに以下のような内容が出力されます。これ(以下では662dc881-c2e3-4ad6-802e-73a36e4fc7e3)がデフォルトのログインパスワード。
(デフォルトのログインパスワードは、起動の度に変わります。)
2014-06-01 11:21:34.180  INFO 4464 --- [           main] roperties$SimpleAuthenticationProperties :

Using default password for shell access: 662dc881-c2e3-4ad6-802e-73a36e4fc7e3
デフォルトのユーザ名はuser、SSH接続ポートは2000のため、この設定で接続してみると・・・
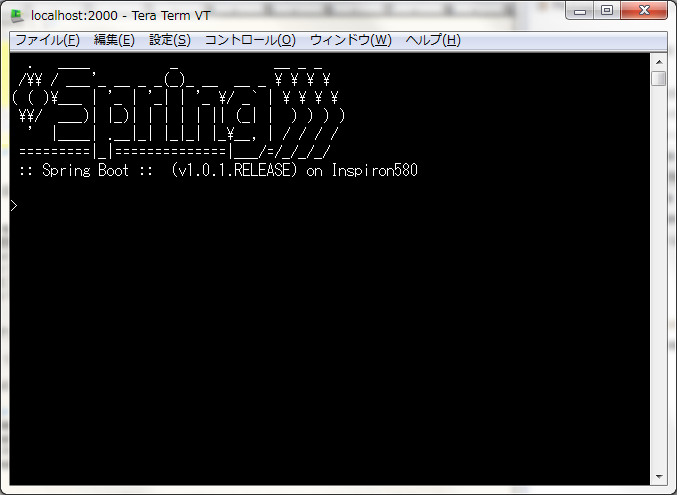
ログインできました!
デフォルトでは、metrics、beans、autoconfig、endpointコマンドが使用できます。
もちろん、JavaやGroovyで自作のコマンドを定義することもできます。
例えば、src/main/resources/commandsディレクトリに、以下の内容でhello.groovyファイルを作成しておけば、
helloコマンドが実行できるようになります。
package commands

import org.crsh.cli.Usage
import org.crsh.cli.Command

class hello {

    @Usage("Say Hello")
    @Command
    def main(InvocationContext context) {
        return "Hello"
    }

}
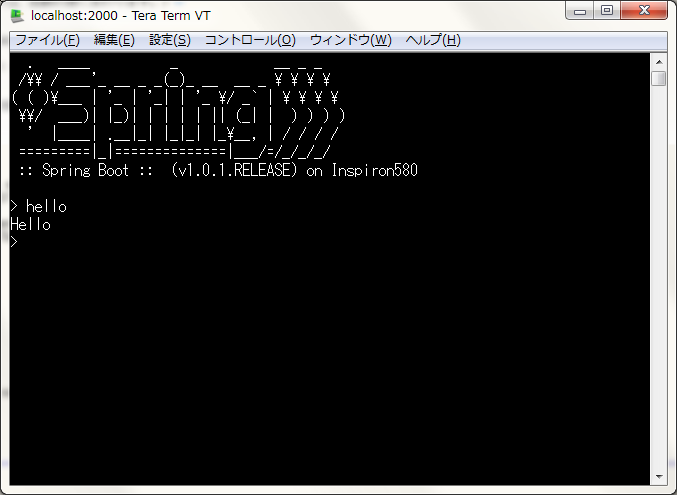
Webアプリのコントロールを行えるようなコマンドを、簡単に提供できそうですね。
ちなみに、このSSHの機能はCRaSHを用いて実現されています。
おわりに
ここで紹介した内容は、設定ファイルはMavenのみで、Springの設定ファイルを何一つ作成していません。
- Springのライブラリ依存や設定ファイルに悩まされず手軽にWebアプリを構築したい!
- Webアプリの管理もRESTやCLIでできるようにしたい!
- Dropwizardのような「ポータブルなWebアプリケーション」を作成したい!
という要望に、Spring Bootは応えてくれそうですね。
では。
Acroquest Technologyでは、キャリア採用を行っています。
- 日頃勉強している成果を、Hadoop、Storm、NoSQL、HTML5/CSS3/JavaScriptといった最新の技術を使ったプロジェクトで発揮したい。
- 社会貢献性の高いプロジェクトに提案からリリースまで携わりたい。
- 書籍・雑誌等の執筆や対外的な勉強会の開催を通した技術の発信や、社内勉強会での技術情報共有により、技術的に成長したい。
- OSSの開発に携わりたい。
少しでも上記に興味を持たれた方は、是非以下のページをご覧ください。
キャリア採用ページ